Welcome back to a third post in the Visual Guide to Azure Access Control Services authentication with SharePoint 2010. In the first part I showed you how to do the basic configuration of Azure ACS and SharePoint 2010 and log in using a Google Id. The second part discussed the most common problems I’ve seen so far. In this post we’ll continue extending the ACS Relying Party to support another Identity Provider - namely Facebook! Depending on what type of site/community you’re trying to build with your SharePoint 2010 site it might be of interest to use Facebook login (they have like a gazillion of users or something). The Facebook AuthN parts are a bit different than the others OOB IP’s in Azure ACS - but not complicated at all, so let’s get started…
Create a Facebook application
The first thing we need to do is to actually create a Facebook application. This is required to allow Azure ACS to convert the Facebook OAuth to outgoing claims, using the Facebook Graph API. And to do this you need a Facebook developer account. You do this by going to http://developers.facebook.com/. Once you have your account you just click Apps in the upper right.
This will take you to all your apps, if you’re new you don’t have any…but you get the point. Next, click the Create New App button. Give the app a display name and a namespace (as always namespaces must be unique - the UI helps you with that). Agree to the terms (you read those, right!?) and click Continue.
You will be asked to fill in the security check - do that and finalize you app creation.
Now we need to do some configuring, but just one simple thing. We need to tell the app how we integrate with Facebook - we’ll do that by checking the Website mark and then entering the URL to Azure ACS - it should be https://[your ACS namespace].accesscontrol.windows.net (you can also find the URL under Application Integration in the ACS portal). Then save the changes. It says this will take a couple of minutes, but we have some more configuring to do so we’ll be okay.
Keep this page open, you’ll need the App ID and App Secret in the next step, when we configure Azure ACS.
Configure Azure Access Control Services
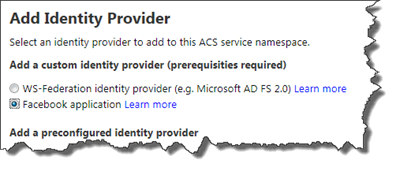
I assume that you have already created your Azure ACS Relying Party, but if you have not revert to Part 1 of this series. Choose to add a new Identity Provider and select Facebook application. Click Next when done.
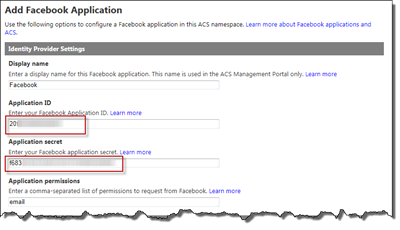
Now you need the App ID and App Secret from the Facebook application, input those values.
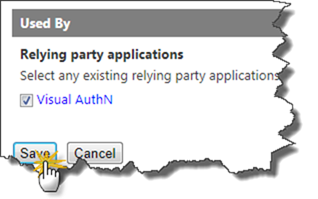
Make sure that the checkbox is checked next to your Relying Party under Used By and then click Save.
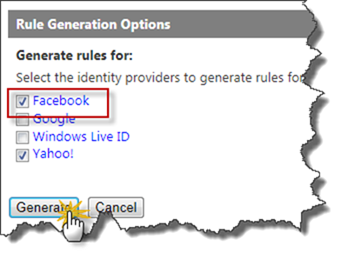
Next step is to create Rules for this new IP. Go to the Rule Group that your RP is using and click on Generate. Azure ACS will by default mark those IP’s that does not have any rules, so just click the Generate button to create the default rules.
Once the rules are created, you can verify that an output claim is created for the Facebook IP using the emailaddress claim.
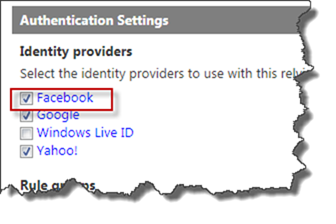
Also check your Relying Party and make sure that it has the correct set of IP’s configured.
That’s it with the Azure ACS configuring. Now all that is left to do is test it in SharePoint!
Login using your Facebook account in SharePoint 2010
Before logging in you need to give access to your Facebook account in SharePoint. You’ll use the e-mail address of the Facebook account - just add it to the Members Group of the site.
Then log out and sign in as a new user and choose to use Azure ACS login. You will now, as usual, be redirected to the ACS Sign in screen and you should see Facebook listed as an IP there. You might have to refresh your browser using Ctrl-F5, since the page might be cached.
When you click the Facebook button you will be redirected to Facebook which will prompt you for your credentials. Log in using the account you just gave permissions.
The first time you will be requested to approve that Facebook sends information to your App, just click Go to App and you’ll be authenticated in ACS.
And voila! You have now logged in to SharePoint 2010 using your Facebook account.
Summary
Making SharePoint take advantage of Azure ACS and the Facebook integration you can very easily create a log in experience that users are quite used to by now. As I have shown you it just takes a couple of minutes.
I just can’t stop writing on this topic, so I’ll be back with some more awesomeness another day…


