UPDATE 2012-02-01: A new and better approach to this is detailed in a new Visual Guide - Visual guide to Azure Access Control Services authentication with SharePoint 2010.
I’m back with the second part of the Visual guide to Windows Live ID authentication with SharePoint 2010 series. Part 1 was a huge success and has received a lot of feedback and hits - I hope many of you out there successfully configured your web sites and extranets. I’m currently working on getting the new Swedish SharePoint User Group website up using Live ID…
This second part will continue where we left it last time, and this time also using a lot of images. Jeremy Thake (MVP), who currently working on a secret SharePoint project, blogged about some of the things I will detail in this post, so for some of you there are stuff repeated in this post.
Give access to users
One of the first things you need to do is to give all Windows Live ID users the possibility to log in to your application. It’s not mandatory but it is really hard asking for the PUID of all users and manually adding them to your site(s). The PUID will be seen by the user by accessing the Live ID account services at https://accountservices.passport-int.net/ or by signing in so they see the access denied page.
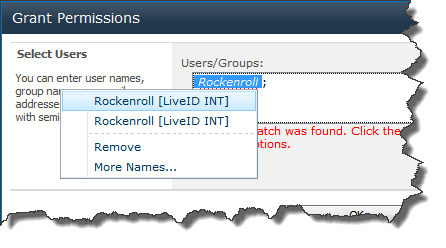
Instead of manually adding users you should add all authenticated Live ID users to a Visitors group for instance and have some kind of application form with a workflow or similar which they must fill-in to become “real members” (sounds like an InfoPath and SharePoint Designer task…). To add all authenticated Windows Live ID users to the Visitors group; log in to your site and select Site Actions > Site Permissions. Then select the Visitors group or any other group of your choice. Clicking New > Add Users will open up the Grant Permissions dialog. If you write anything in the Users/Groups field and click Check Names you will see that you can actually type anything and it will be valid.
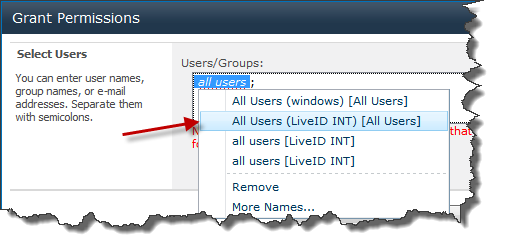
The Live ID authentication provider accepts any string and it does not perform a lookup with Windows Live ID, so essentially you can use any string . But users will only be sent from Live ID to your site with a PUID (nnnn@live.com), so you can’t give access to a user without the PUID. If you write All users instead this will perfectly resolve to two interesting groups; The All Users (windows) and All Users (LiveID INT) - all depending on what authentication providers you have, in this case the standard Windows login and Live ID (INT) is enabled for the web application. If you select the All Users (LiveID INT) and add it to the group, all authenticated Live ID users will be a member of it.
You can also click the Browse icon and bring up the People Picker dialog, which has a new look when claims is enabled for the web application. To select the All Users group for Live ID select the All Users node in the tree on the left hand side and then select the All Users (LiveID INT).
Worth noticing here is you cannot “search” for a Live ID user - not by name, e-mail or anything. You always need the exact PUID or username when claims mode is enabled.
Anonymous Access
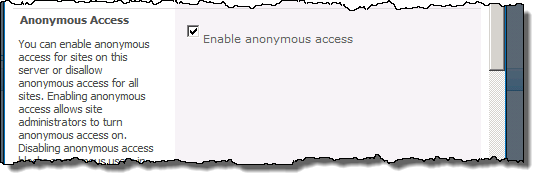
So, now you have allowed all Live ID users to log in to your site. Enabling anonymous access to users is no different than before. First you have to change the Authentication Provider of the Web Application (Central Administration > Manage Web Applications > Select Web Applications > Click Authentication Providers in the Ribbon > Select Authentication Provider). Just check the Enable anonymous access for the authentication provider and then click OK.
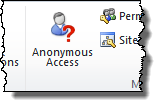
Next you have to enable anonymous access per Site Collection. Once again go to Site Actions > Site Permissions and click on the Anonymous Access button in the Ribbon menu.
Then select what the anonymous users can access; Entire Site, Lists or Nothing.
Once you have done this new users will not be required to log in to your site immediately. Instead they will see the “Sign In” link in the upper right corner.
The display name of the user
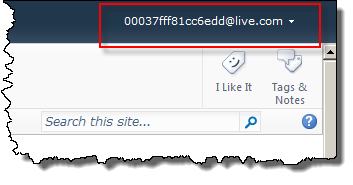
Once the user logs in to the site the user name still looks pretty ugly - it’s just the PUID that is given to SharePoint from the Windows Live ID login service. Unfortunately Windows Live ID only returns one single claim and that is the UPN, which is in the form of a e-mail address. That e-mail address is not even a valid address. You can not expect to get the full name or e-mail of the user from Live ID - you have to implement something of your own OR use the built-in amazing stuff in SharePoint.
What amazing things do we have in SharePoint then? First of all - if you are on SharePoint Foundation, it’s not that amazing at all. You have to live with the PUID or build something of your own and keep all your Site Collections in sync.
But if you are lucky to set up a SharePoint Server then you can take advantage of the User Profile Service Application. Configure the UPA according to all best practices - but do not configure the User Profile Synchronization (UPS), we do not need it and it does not synchronize with Windows Live ID anyways. Only configure the UPS if you are using both internal Active Directory users in combination with Live ID.
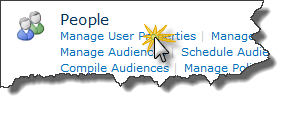
Once you have configure the User Profile Service Application go to Central Administration > Manage Service Applications and select the User Profile Service Application. Then click on Manage User Properties. We will do that to configure what properties the users are allowed to change.
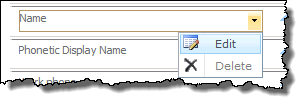
You can change a whole lot of User Properties here, but the most important ones are Name and E-mail. We need to make sure that the user can edit those. Browse down to the Name property and select to Edit it.
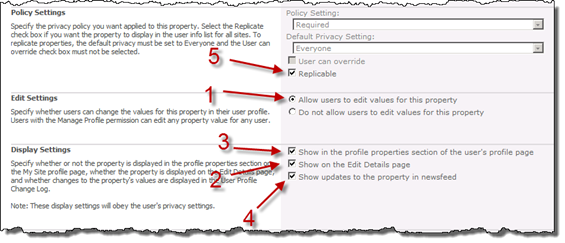
To make the Name editable and usable there are a couple of things that we need to take care of:
- Make sure that the property can be edited
- Make sure that it is visible on the Edit Details page
- Choose if the property is publically visible on the profile page
- Choose if updates to the property should be visible in the newsfeed
- Make sure that the property will be replicated from the profile into the userinfo list in all Site Collections
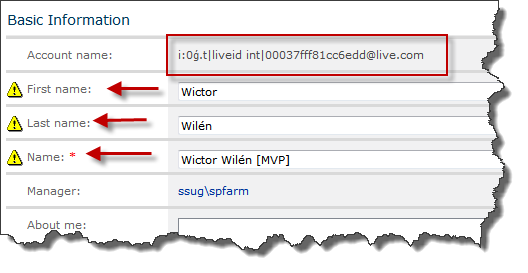
Once you have configured the Name and Email property (at least) you are ready for a test drive. Log in to your site and choose My Profile from the login (upper right) menu and click on Edit My Profile. As you can see you are now able to edit the name, by default it is the PUID. Update the settings and click Save and Close and go back to the your main site.
Once you get back to the site you will probably see that the PUID is still there, hold on and don’t start crying yet. It takes some time to synchronize between the user profiles and userinfo lists. You can speed up the process by running the “User Profile to SharePoint Full Synchronization” job - normally run once an hour.
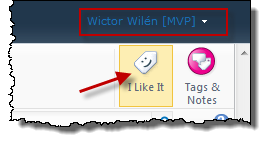
After a successful sync you should see that the upper right menu shows the Name that you specified in the user profile.
HTTPS and HTTP
There is one final thing that you should do before continuing with your site and submit it for the PROD environment and that is to allow users to browse your site without HTTPS. The login procedure must use and will still be using HTTPS. Fire up the IIS manager and select the web site that you have been using and select to edit its Bindings.
Add a new Host Header binding or other binding of your choice using the HTTP protocol and then click Close.
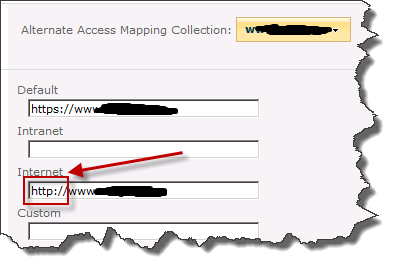
Then open Central Administration and select Application Management, under Web Applications choose to Configure alternate access mappings (AAM). Choose to Edit Public URLs and then select your web application. In the Internet Zone add the URL of HTTP address, using the HTTP protocol and then click Save.
Once this is done you should be able to browse to your site using the HTTP protocol, and then if you click the Sign In link you will be taken to Windows Live ID and be authenticated. When you are successfully authenticated Windows Live ID will redirect you back to the HTTPS address (remember that you specified the Return URL in the MSM using the HTTPS protocol, in part 1). From now on you can move seamless between the HTTP and HTTPS zones.
There are other options here as well, such as extending the web apps, but that is for someone else to write about…
Summary
That’s it, you should now have a fully functional Windows Live ID enabled site. You can even edit the site using SharePoint Designer using the Live ID account. Next part will give you the details on how to move this site from the INT environment to production (PROD),
Until next time…


